Saturday, December 11, 2010

Tutankhamo's belt and kilt

I worked on the belt and the kilt of the pharaoh today. I'll leave the sash to another day - it is full of tiny precious stones and will be quite a job to paint. Next I think I'll start on Ankhesenamun so that Tut will have time to dry. Wouldn't want to smudge my work by accident if I now tried to paint the sash...

Monday, December 6, 2010

Tut's collar and torso

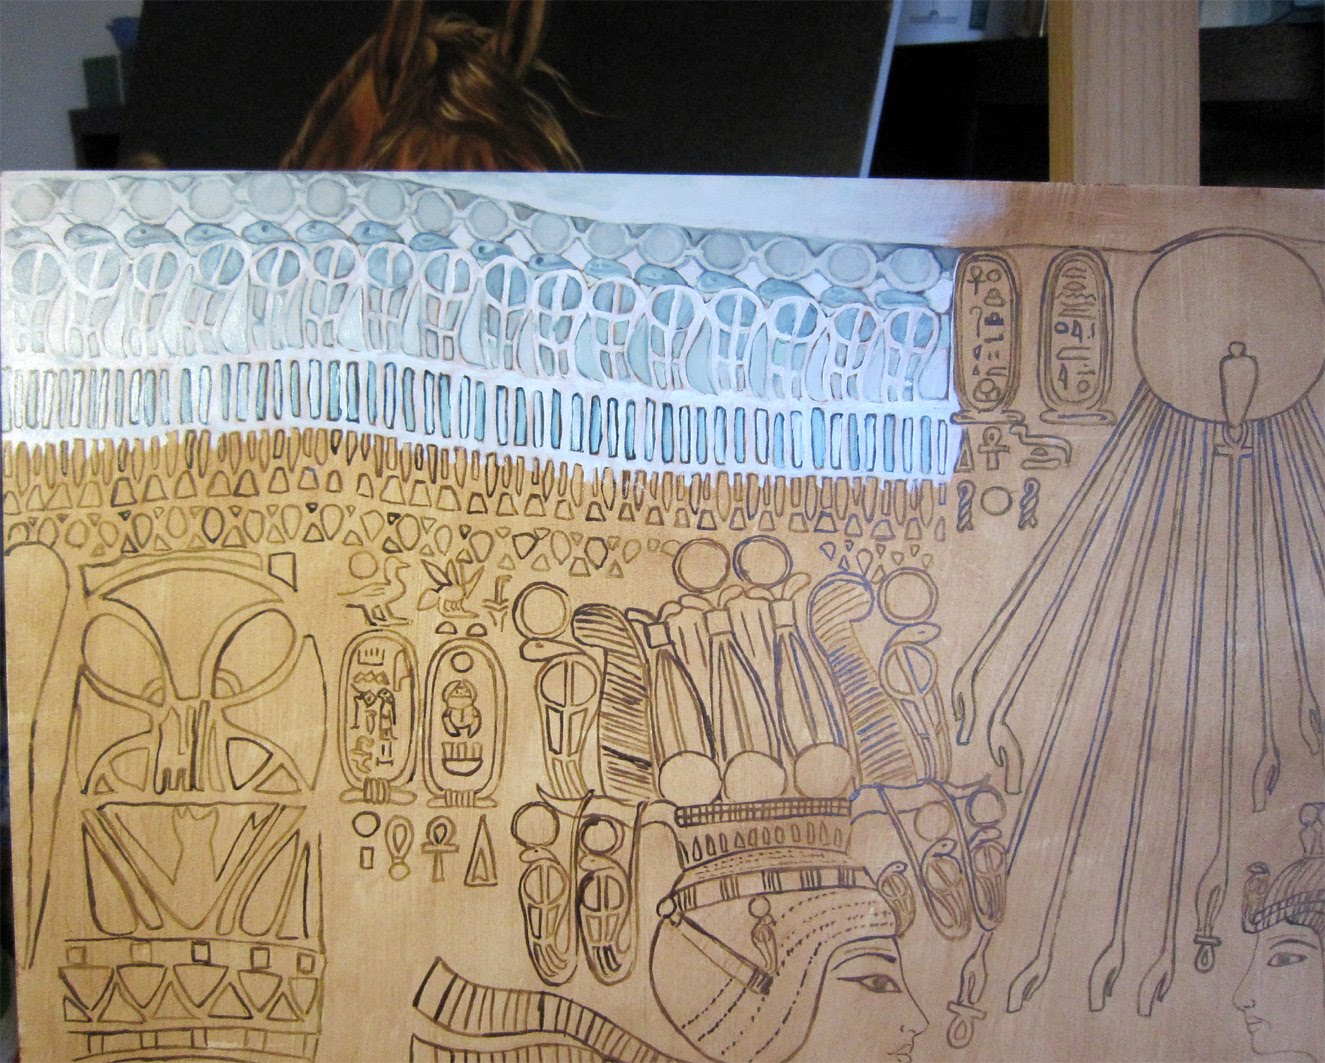
Here I first painted the collar...


And today I painted his hands and torso and feet. He is shown as a handsome young man, even though we know today that he suffered from illnesses. But the ancient Egyptians could not show their pharaoh as anything else but ideal - anything else would have been against "maat" or balance, if you will. Just like Hatshepsut depicted herself as a man, when she took the crown of pharaoh, Tut was depicted as perfect despite his health problems. Appearance was everything with the ruler.

But then again, think how Tut's father, Akhenaten was depicted. His female form and elongated face, heavy lips and slanted eyes must have been a horror to the traditional Egyptians. So in case of his son (and daughter, as Ankhesenamun here is Tut's half sister) traditional art was the way to show them to the world.

Normal Egyptians did not prefer sibling marriages, but the royal family found this to be a way to keep the crown within the family. They had no wish to extend their small elite group or unite with other families.  So the Great Royal Wives were more often than not from within their own small family. The lesser wives could be outside the immediate families - their sons became pharaoh usually only if the Great Royal Wife (or queen as we say it, even though they had no such word) did not give birth to a son or if her sons died before their father the pharaoh. And even then the lesser wives did not rule the country if their sons were still children - no, if it was necessary, it was the Great Royal Wife who ruled the land for the child-pharaoh until he became of age to take the crown. The mother of the new king got the title "Kings Mother" and was respected for it.

It seems Tutankhamon was the the son of Akhenaten and his full sister, according to the latest DNA research. So it seems Nefertiti did not give birth to a son, or if she did, he died in infancy (boys were not usually shown with the pharaoh in art, but daughters often were, so we don't know if Nefertiti had a son). But Nefertiti was the Great Royal Wife and probably took over the upbringing of the small Tutankhaten and after Ekhnaton's death had a role in making him pharaoh.

Sunday, November 28, 2010

Tut's crown and head

Took me seven hours to work the underpainting of the crown and the head. Obviously not all done - when I work with color I'll be putting the details in place.

 Here is the whole painting so far...
And here is the pharaoh's head. The reference photo I am using here shows the face rather "flat" but I digged out ever photo and book showing this throne that I have, and made the face more lifelike.

Sunday, November 14, 2010

Tut's Throne - background all blocked

Now I have blocked the background - but it will not stay this smooth in the finished painting. Years have crumbled the gold foil of the chair and it is quite wrinkled.

Saturday, November 6, 2010

Tut's Throne - right pillar and background

Today I lightened the pillar on the right a bit - it was dry enough. Then I painted the cartouches to the left of the pharaoh's head and blocked in the bakcground between him and the left pillar. Added some preliminary shadows there too.

Tuesday, November 2, 2010

Tut's Throne - pillar on the right

Finished the underpainting of the pillar on the right - I'll wait for it to dry and then add lights to soften the colors which are now too dark.

Sunday, October 17, 2010

Cobra Frieze...

Worked some more on the frieze... Next I'll be working on the pillar on the right.

Thursday, October 14, 2010

Upper right cobra frieze

And here I have done three painting sessions since last time. Almost done with the right hand side frieze of cobras. The "3D" effect is beginning to show, hopefully.

Wednesday, September 29, 2010

Tut's Throne - left pillar almost done

Today I painted the underpainting on the left pillar. I have worked on the already painted area too, "breaking" the too monotonous color. If you look at the lower part of the pillar, you'll notice the colors are brighter and flatter. Will work on them more once they have dried a bit.

Monday, September 27, 2010

Tut's Throne - pillar on the left

And the underpainting progresses. The idea is to have the "moonglow" effect on the underpainting, and this seems to be about right in that respect.
I have mostly concentrated on the light here - shadows will come with the color stage.

Thursday, September 23, 2010

Tut's Throne - left side canopy's underpainting done

Finished with the left side of the underpainting of the canopy above the royal couple. Next I'll be moving down the "pillar" on the left.

I paint from left to right to my hand won't smudge the wet oil paint.

Sunday, September 19, 2010

Tut's Throne - upper left again

Only had a little time today, so I just painted these stones below the cobras.

Tut's Throne - The whole painting so far

And this is the progress of the whole painting so far.

Tut's Throne - Working on the cobras

Worked on underpainting of the cobras on the upper left. The cobra was the symbol of the protection of the fiery power of the god Ra.

The cobra goddess who protected the pharaoh was called Wadjet, the Eye of Ra. She was the goddess of Buto, and was considered to be the personification of the Lower Egypt (that is: the northern part of Egypt). She was present in the crown of the king together with her sister, the vulture goddess Nekhbet. Together they represented the Upper and Lower Egypt and symbolized the king's rule of the whole country.

Thursday, September 2, 2010

Tut's Throne - first brush strokes

The first brush strokes of the underlayer. I'm not doing too sharp details at this stage - the time for that will come with the color layers.

Look a bit like lace, doesn't it?

Sunday, August 29, 2010

Tut's Throne - imprimatura

Imprimatura - a very thin first layer of color using burnt umber (with turpentine) to help me get the values right on the underpainting.

Saturday, August 28, 2010

Tutankhamon's Throne - underdrawing now done!

This has been a day's work, literally. It took me 24 hours just to transfer my drawing to the board - so many tiny details you cannot imagine...

Next I'll start with the actual painting process. Hope you'll have the patience to follow with my work.

Friday, August 27, 2010

Where's Menkaure?

If you have been wondering about Menkaure, I have not forgotten him. I am simply so busy finishing horse paintings for a coming horse art show I haven't had time to continue with him for a while. Soon the horse paintings will be done and I can continue with Menkaure together with Tut's Throne.
If you wish to check on my horse paintings, go to http://leenas-horses.blogspot.com/

Tuesday, August 24, 2010

Tut's Throne - almost there with the underdrawing

And almost there... Only the cobra-frieze (and all those tiny stones beneath it) is missing and then I can start the painting process...

Wednesday, August 18, 2010

Tut's Throne - table and necklace

I added a small stylized table behind Ankhesenamun. Above is this round thing - it is a necklace. The ancient Egyptians showed objects on the table or in boxes above them - and depicted them straight from above.

There were so many tiny stones in this one it felt almost desperate to try to draw them all. But then I thought about the original artists who put this piece of art together one little stone or gold piece at a time - and decided I had it easy, after all!

Tuesday, August 17, 2010

Tut´s Throne / Ankhesenamun

Now I have added the line drawing of Ankhesenamun. Her feather headdress and collar have quite a few details - lots of work for a miniature brush.

Sunday, June 13, 2010

Tutankhamon's body - line drawing ready

Took me three hours to transfer the drawing of Tutankhamon to the board, but now he is done. I tried to make the beads approximately right, but obviously I did not put all the details in place. My reference photo wasn't quite good enough for that. I squinted with my magnifying glass, tried printing details of the photo, but still it was blurry.

But thank goodness I found help. The Werner Forman Archive was more than kind and gave me permission to use their photo as a reference to this painting. Please check their wonderful resource of photos for anyone working in the field of history - be it studying of publishing. You will find their link on the link list.

Tuesday, June 1, 2010

Tut's Throne - Drawing of Tutankhamon's Head

It took me two hours just to transfer Tut's head with his crown onto the board. What an amount of details! And this is nothing yet... More tiny details coming. Lots of them.

Saturday, May 29, 2010

Menkaure's Kilt

Now it was the turn on Menkaure's kilt. Needed my magnifying glass for this one - first on the reference photo and then while I carefully nicked the board with my scalpel.

Tuesday, May 25, 2010

Tutankhamon's throne - beginning the underdrawing

I have made the drawing of Tut's throne and now I have begun to transfer it to my painting board, using ink and a small brush. I was kindly given a reference photo of it by Bob Partridge from the Ancient Egyptian Magazine.


So far the painting has taken me four hours. This will be taking its sweet time...

Wednesday, May 5, 2010

Menkaure's and Hathor's hands


We still have renovators working on our apartment and it has been quite a job to rearrange everything into place. But now I finally found a little time to work on Menkaure. I concentrated on the hands of Menkaure and Hathor and on the background slab that defines Menkaure's kilt.

(The whites here are a bit overexposed, the work is not this white.)

And guess what: I have started on drawing Tutankhamon's throne. Will be posting pics of that soon too.

Saturday, April 17, 2010

Menkaure's torso and arms

Here I have started to work on Menkaure's torso and arms - obviously not yet finished.

While I have been working on this, I have really started to wonder about the skills of the ancient artists. This statue was made about 2500 BC - during the 4th Dynasty, Old Kingdom. Just think of the tools these artists had: how many could do similar work in todays world using the same tools?

I can only hope this work does justice to the skills of the ancient Egyptians.

Thursday, April 8, 2010

Closeup of the stone slab

Here is a closeup on the stone slab and the crown. I may work on the crown some more - have to let it rest to "see" it again. It sure is a challenge to try to create realistic-looking stone by scratching with a  scalpel. I had no idea how to do that, so I just had to make the first scratch and then continue until I felt I "got it". Would be nice to hear does the slab look like stone in your opinion? There were slight light variations in the actual slab, along with some nicks and dents, so I tried to make them show too.


Monday, April 5, 2010

Menkaure's crown and the stone slab

I worked on Menkaure's crown and the stone slab between him and the goddess Hathor. The stone slab is of dark colour, but I chose to bring out the light more so that I could make the shadows more dramatic - you can call it artistic lisence Also I tried to bring out the slight light variations on the stone slab.

Sunday, March 28, 2010

The background

Now it was time to start bringing out the background slab - it gives a more 3D feeling to the statue itself. Also again this was necessary so I could continue with the feet - the light on the slab defines the feet as well.


And even though the stone is very dark, I did not want to leave it totally black. So I added tiny specks of light into the shadows to make it more live.

Next I will return to the feet.

Saturday, March 27, 2010

Hathor's feet and hieroglyphs


Now I worked a bit on Hathor's feet. The shadows and lights on this goddess are rather demanding so I had to do the hieroglyphs in front of her at this point - they are amazingly white and give me a reference point (for the light values) when I continue with the shadows of the feet.

Tuesday, March 23, 2010

Hathor's legs

Worked some more on Hathor's legs. Reached the hemline with the highlights, but the legs are in no way ready yet. The ancient Egyptians loved tight dresses on their goddesses and women also. No idea if they ever had such dresses. (Really - if they did walking must have been just about impossible... But what wouldn't a woman do for beauty...)

(Sorry for the glare on the left side of the photo).

Saturday, March 20, 2010

Hathor's torso and right arm

Here I worked some more on Hathor' torso. It isn't quite done yet, but I started on her right arm as well to get a better feel on the lighter parts.

Again this is a photo, not a scan, so the lines appear a bit blurry.

Monday, March 15, 2010

Highlights on Hathor's torso

Worked some more on Hathor's body. The strongest highlights mostly, but I did work a bit on the half-shade parts too. The torso in no where near finished, maybe half way there.

(There are some black smudges on the shoulder and on one side of the body - that is just the scraping residue I forgot to brush off)

Saturday, March 13, 2010

Hathor's upper torso

Here I have worked some more on Hathor's upper torso. I did mark some of the coming highlights so that you have an idea of the shape of her body.

Tuesday, March 9, 2010

Right. Here's the photo I took of the work I've done on Hathor so far. The distance from one horn tip to another is 6 cm. The pic was taken in less than ideal lighting conditions, the camera overexposes the whites and made the lines look too thick. But I try to take a better photo once I have a chance to photograph this in daylight.


Wednesday, February 24, 2010

Part of Hathor's Wig Done


Here I have worked a bit on the wig of Hathor. It is quite interesting to try to achieve the dull shine of stone. I think I am beginning to get there with the lappet I have worked on.

Saturday, February 20, 2010

Palette


Here you can see my palette for Cleopatra and Caesarion. Brown, blue and white - a so called "limited palette". Hubby says I should frame this one too LOL

One of the advantages of a limited palette is that the color scheme remains harmonious. And as you can see, no black was needed. You can get pretty dark shades by simply mixing blue and brown. (Or if you really mix your colors completely yourself: first make orange by mixing red and yellow and then add blue until you get the shade of brown you like. The more blue you put into it, the darker it becomes. With the use of ultramarine blue you can get very deep dark browns.)

Done! Cleopatra and Caesarion


Here it is - finally all done. Cleopatra and Caesarion on the back wall of the Denderah temple.

40,5 cm x 50,5 cm. Painted on Ampersand museum-quality clayboard with VanGogh Oils. I have only used three colors: blue, brown and white, nothing else. All the shadows have been mixed from blue and brown - I believe it gives a more vivid and lively feeling than black would. Also that way the light reflected back to the relief from the ground up can be painted more realistically.

I would like to thank a few people here for sending me detailed reference photos:

Barry Burnett: I could not believe someone would take the trouble to actually travel to Denderah and take photos for me of the parts of the relief that were not showing properly on my own photos. Your detailed photos really were heaven sent. Thank you so much!

Hans Kontkanen: Your photo gave a very good, sharp overall view of the wall and I did refer to it many times when I was putting Barry's photos "in context".

Vincent from Talking Pyramids (see link on the left):
You gave me links to many good sharp photos so I could compare my painting to them. Also you have been kindly telling people of my painting process on your marvellous blog. Everyone: go read Talking Pyramids. If you are at all interested in ancient Egypt, you'll find yourself hooked for hours of interesting reading...

Thursday, February 18, 2010

Closeup on Hathor's Crown


A closeup on Hathor's crown. All is done with a very sharp scalpel and some steel wool - but not normal steel wool. That would leave an oily residue. The steel wool in question is almost cotton soft, and especially made for scratchboard.

I hope I got the disc scape clearly visible. Also the photo lies a bit - the horns are slightly darker than in the photo.

Menkaure Triad: Hathor's Crown


Here is the what I managed to do on the first session. The crown of Hathor so far.

Here you can see how the white undercolor is revealed by scraping with a scalpel.

Menkaure Triad Started


I have to admit I could not resist - I got my scraping board and started working on the Menkaure triad already.
First the sketch: First it had to be drawn, then transferred to the scraper board (by coloring the back of the drawing with graphite and re-drawing with a sharp pen so that the drawing transferred to the board). And because graphite may wear off while I work on this, I had to use the scalpel to do tiny nicks along the lines.

Here's the drawing (a bit hard to take a photo that would show those faint faint lines)

Two hours of work


Here's what I painted today. Two hours of work - I am living in the hope of getting Cleopatra and Caesarion finished this weekend. I should - only one week left before our renovation starts and I cannot have this painting all wet when I transfer it to our rented apartment...

Sunday, January 31, 2010

And the Latest Closeup


Goodness, almost forgot to post the closeup of the latest bit painted! Here you go...

Almost there...


Finishing this painting will probably take 6-8 hours of work after today's painting session.

Studying Egyptology is so much fun - but also time consuming. I was preparing my essay on the burial architecture of the early Dynasties and only after submitting it I had time to paint again. I am in a bit of a hurry to finish Cleopatra and Caesarion because we'll have to move away for two months when our home will be renovated. I can't paint with oils during that time, but I ordered something else.

This painting is not done on ordinary canvas but Ampersand board. It has a silky smooth surface which makes it possible to paint the tiniest details. And you may have noticed I like to paint details LOL :D

For the time I cannot paint with oils I ordered material for a different kind of work. Tut's throne will have to wait a bit as it will be an oil painting, but in the meanwhile I am thinking of doing a work on the pharaoh Menkaure and two goddesses, a beautiful black statue. So I thought why not try scraper board. No, not the children's kind but museum quality artists' board (yes, yet again Ampersand). If you think this painting is full of detail, just you wait when you see what is possible with a scalpel and good quality board...

But that will come only after this one is finished in February.

Sunday, January 17, 2010

Latest glyphs in closeup


This little patch took almost four hours to paint: one strip of glyphs right down from Caesarion's elbow and two lines going to the right from the same spot. And I did not even realize the passing of time while I painted.

Hieroglyphs galore...


Spent almost four hours doing today's small bit. Hieroglyphs are not fast to paint. Have to take into consideration someone who atually is fluent in glyphs may try to spell what it says here :)

Wednesday, January 6, 2010

And the previous part up close


And the part I last painted shown a bit closer. Not the shadow to the right of Caesarion is almost complete, making him a bit more 3D.

Shadow to the right of Caesarion's torso


And here I have defined the shadows to the right of Caesarion's torso and (drumroll, please....) painted some more hieroglyphs! (Now that must have surprised you LOL :D )